Why Is My Solenoid Valve Not Working?
Why is my solenoid valve not working? This question often appears after a pump runs, a control light turns on, and nothing moves. A solenoid valve may look simple, but several conditions must align. The coil needs the correct voltage. The valve also needs clean fluid, suitable pressure, and a clear flow path. One small mismatch can stop the entire system.
A careful diagnosis begins with safety. Isolate electrical power and release stored pressure before touching the valve. Then check the label, wiring, fuse, and measured voltage at the coil. Do not trust the indicator light alone. It may show a control signal, not useful power at the valve. A multimeter can reveal an open coil, incorrect voltage, or a loose connection. Listen for a firm click, but remember that sound does not prove proper flow.
Dirt is another common cause. A tiny particle can hold the plunger open or closed, especially in water, air, or process lines. Check the arrow on the body and confirm the valve’s installation direction. Some pilot-operated models cannot work without adequate pressure. Others fail because their seals swell, their vents clog, or their coil overheats. I have seen technicians replace a coil when the real problem was a blocked filter. It is easy to make that mistake. A reliable repair compares test results with the manufacturer’s manual, rather than guessing from appearance. If the cause remains uncertain, stop testing and ask a qualified technician to inspect the system.
What a Solenoid Valve Does and How It Should Operate
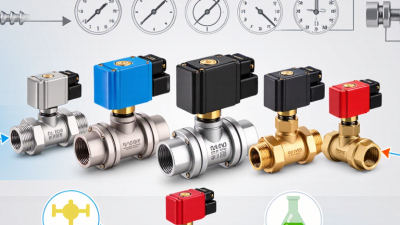
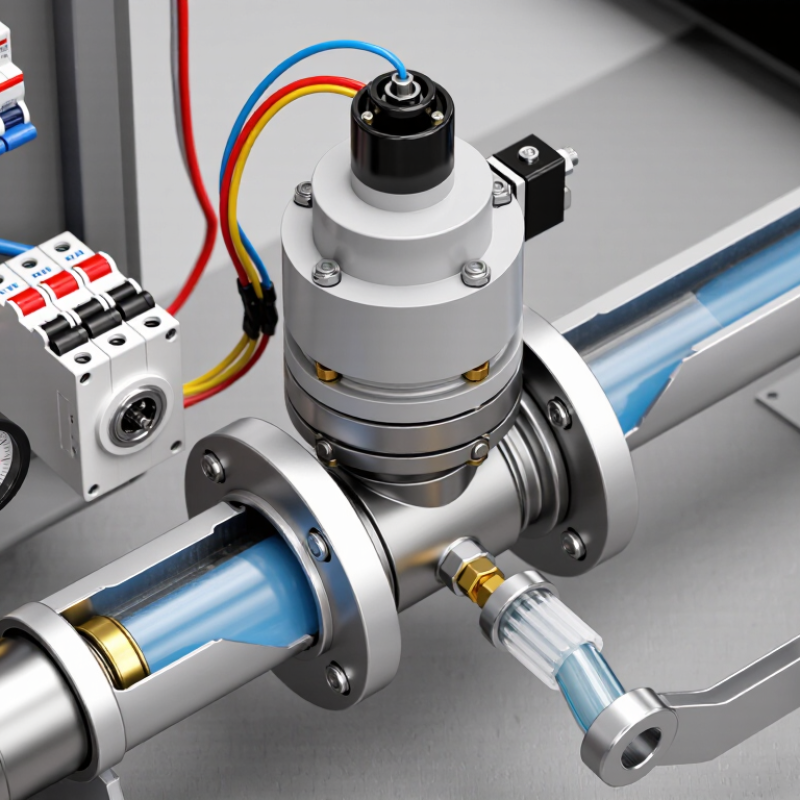
A solenoid valve controls liquid, air, or gas through an electrically operated coil. When the coil receives the correct voltage, it creates a magnetic field. That field lifts or shifts a metal plunger inside the valve. The passage then opens or closes, depending on the valve design.
Most valves are normally closed. They remain shut without power and open when energized. Normally open valves behave in the opposite way. A spring returns the plunger when power stops. Small valves may operate directly, while larger pilot-operated valves need enough pressure difference to move correctly. This detail is easy to miss.
Listen closely. A clear click suggests movement, but it does not prove proper flow. The coil may have power while the plunger remains stuck by dirt, corrosion, or damaged sealing material. I have seen valves blamed on wiring when blocked inlet screens caused the real problem. That assumption can waste time.
Check the rated voltage with a suitable meter, then isolate power before opening connections. Inspect the connector, coil, tubing, and flow direction. Never force the plunger with sharp tools. Confirm that the system pressure matches the valve’s operating range. A valve can appear functional on a bench yet fail under pressure. If the coil becomes unusually hot, stop testing and investigate the voltage, duty cycle, and mechanical resistance.
Common Reasons a Solenoid Valve Stops Working
Why Is My Solenoid Valve Not Working?
Common Reasons a Solenoid Valve Stops Working
A solenoid valve may stop working because its coil receives no power. Check the supply voltage at the terminals, not only at the control panel. Loose wires, blown fuses, and damaged connectors are frequent causes. A healthy coil usually shows measurable resistance, while an open reading suggests an internal break. Always isolate power before testing resistance.
Dirt can also hold the plunger in place. Small particles may collect around the valve seat, especially in older water or air systems. Remove the valve only after shutting off pressure, then inspect the bore, spring, and seal. A swollen seal may block movement. It happens more often than many maintenance guides admit. Incorrect flow direction or insufficient pressure difference can create the same symptom.
Heat is another warning sign. A coil that feels unusually hot may have the wrong voltage, continuous-duty stress, or poor ventilation. Listen carefully. A faint click means the coil may move, but the valve could remain blocked mechanically. No click points toward power, wiring, or coil failure. I have seen technicians replace the entire valve too quickly, then discover a loose terminal. That mistake wastes time and hides the real fault. Check the simple evidence first, but do not assume it explains everything.
Why Is My Solenoid Valve Not Working? Expected Coil Voltage Waveforms
A solenoid valve may stop working when the coil receives no voltage, insufficient voltage, or the wrong type of electrical signal. This reference chart compares a steady 24 V DC supply with a 24 V AC supply at 50 Hz. The AC waveform reaches approximately 33.9 V peak because 24 V AC is an RMS value. If the measured waveform differs from the valve’s rated supply, inspect the fuse, wiring, controller output, connectors, and coil resistance before replacing the valve.
How to Test the Coil, Wiring, and Valve Components
A silent solenoid valve often has a simple cause: the coil receives no usable power.
Start with the machine isolated and follow its safety procedure. Check the nameplate voltage before testing. A digital multimeter should measure voltage across the coil terminals while the control signal is active. A reading near zero suggests a fuse, relay, connector, or broken wire. Confirm polarity on direct-current circuits.
Turn power off before measuring resistance.
Compare the coil reading with the manufacturer’s specified range. Infinite resistance usually means an open winding. Almost zero resistance may indicate a shorted winding. Heat matters. A coil can test normally when cold, then fail after several minutes. I have seen loose terminals create this misleading pattern.
Inspect the wiring for crushed insulation, green corrosion, and pulled pins. Gently flex the cable during a continuity test. Do not trust visual inspection alone. The U.S. Department of Energy’s Industrial Decarbonization Roadmap reports that industry uses about 30% of total U.S. energy, making small control losses worth investigating.
For the valve body, remove the coil only after depressurizing the line.
Check for a stuck plunger, blocked orifice, damaged seal, and incorrect flow direction. Listen for a sharp click. No click does not always prove failure; excessive pressure difference or contamination can prevent movement. Document voltage, resistance, temperature, and pressure. My own testing can miss an intermittent fault if I record only one reading.
How to Repair, Replace, and Prevent Solenoid Valve Failures
Why Is My Solenoid Valve Not Working?
How to Repair, Replace, and Prevent Solenoid Valve Failures
A silent solenoid valve does not always mean a failed coil. Turn off electrical power and release system pressure before inspection. Check the supply voltage with a multimeter. Compare the reading with the valve’s rated voltage. A loose terminal, broken wire, or burnt coil can stop operation immediately. If the coil passes testing, remove it and inspect the valve body for dirt, rust, or a blocked orifice. Small particles can prevent the plunger from moving.
Clean removable parts with a suitable solvent and a soft brush. Do not scratch the sealing surfaces. Check the diaphragm, spring, and internal seals for swelling or cracks. Replace damaged components with parts that match the valve design. Sometimes replacement is safer than repair, especially when the body is corroded or the coil smells burnt. Confirm the new valve’s voltage, port size, pressure range, flow direction, and seal material. A similar-looking part may still be unsuitable.
Prevention starts with filtration and correct installation. Keep moisture away from electrical connections. Tighten fittings carefully. Excessive force can distort the valve body. Test the valve after installation by checking both sound and actual flow. A clicking noise alone proves little. Regularly inspect wiring, mounting position, and pressure conditions. One common mistake is ignoring the operating environment. Heat, chemical exposure, and frequent cycling can shorten valve life. I would also recheck the diagnosis before ordering parts; replacing a valve cannot fix an upstream control problem.